
10. Setting Calibration
The calibration process is necessary to remove any inaccuracies in the installation, differences in manufacturing of the electronic components, etc to provide an accurate and repeatable level state for your RV. The calibration normally only needs to be done once, however the process can be repeated at any time.
Ensure that the installation and setup is complete before starting the procedure. You are free to rerun the calibration process any time you wish in the future.
Before you can begin the calibration process Level Up will require two measurements and for these measurements you will need the following tools:
measuring tape (25 to 50 ft)
spirit level
pen/pencil and paper (or you mobile device)
10.1. Trailer Measurements
The Level Up module requires two measurements to accurately determine the side to side tilt and front to back pitch of your RV. You will need to measure your RV for side to side (s2s) and front to back (f2b). Each of the measurements are explained in more detail below.
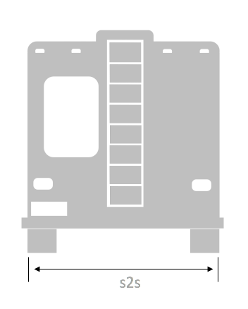
10.1.1. Trailer Width
The trailer width (side to side - s2s) measurement is taken from the outside of the drivers side tire on your RV to the outside of the passenger side of the RV. If your RV has multiple axles choose the axle that is easiest to measure.
10.1.2. Trailer Length
The trailer length (front to back - f2b) measurement is from the center of the axle to the trailer tongue jack or in the case of a fifth wheel the center of the axle to the font jacks. If you have a double axle trailer measure from the rear most axle to the pin. Should your trailer have three rear axles measure from the center of the middle axle to the the pin.
10.1.3. Double Axle Trailer
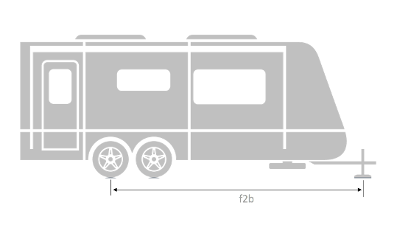
Double Axle Towable Travel Trailer
10.1.4. Fifth Wheel Travel Trailer
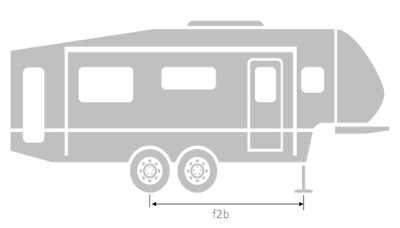
Double Axle Fifth Wheel Travel Trailer
10.1.5. Class A,B,C or Truck Camper
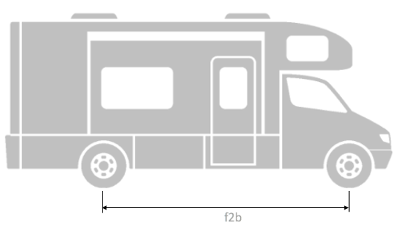
Class A,B,C or Truck Camper
10.1.6. Single Axle Trailer
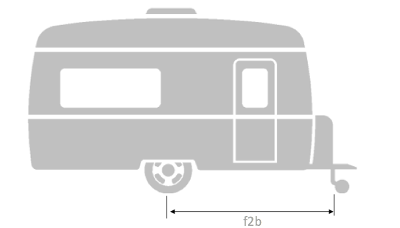
Single Axle Towable Travel Trailer
10.2. Getting Started
Before starting on the actual level calibration it is important to setup the trailer like you would on a campsite. If your trailer has slides make sure they are fully deployed. As with all other slide deployments ensure that you have sufficient clearance. Ensure that doors in the RV don’t swing open or closed and close properly. Use the spirit level to ensure that the trailer is level front to back and side to side. Once the trailer is level retract the slides to the closed position, but leave the RV jacks down. Now you are ready to begin the level set progress.
10.2.1. Running Calibration
Once you have completed the process of levelling your trailer with the level, download the oneView mobile aplication. You can find more information in the Installation section of the Level Up manual.
Once installed Go to Settings | Trailer Configuration and press the Set Level button. (depending on your mobile device you may need to swipe up to get the Set Level button to appear (its at the bottom of the screen)).
The oneView application will start to collect data from the Level Up module to complete the level reference. The process should take about a two minutes to complete.
10.2.2. Setup Wizard
The setup wizard appear in the oneView everytime a new RV/Trailer is detected. If you would prefer to setup the trailer settings manually, just tap on the skip button on the top left of the screen. oneView will ask if you wish to return the setup wizard the next time you connect to the device.
The Level Up configuration wizard takes you through:
General - Trailer Name and License Plate
Units -Distance Units (metric or imperial)
Orientation - installation orientation of device
Resolution - measurement resolution
RV Configuration - RV Type, Trailer/RV Length, and Trailer/RV Width
Real Time Clock - enable RTC Level Up Pro only
EMS Configuration - enable EMS Monitoring Level Up Pro only
Battery Configuration - enable Battery Monitoring Level Up Pro only
10.2.3. Setup Wizard
If this is the first time the oneView application has seen Level Up module, you will be presented with a setup wizard. You can choose to skip the wizard, oneView will prompt you if you would like to run it in the future. Choose Yes or No.
The wizard will step you through the process of setting up the Level Up module.
10.2.3.1. Welcome
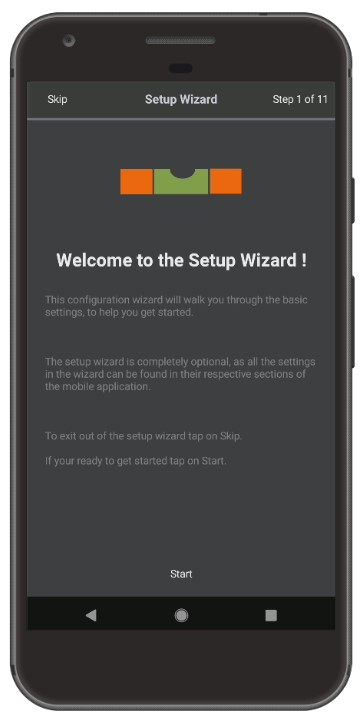
The welcome screen is the getting started screen for the wizard. This is also the opportunity to skip the wizard by pressing the Skip button on the top left. Depending on the Level Up module there are up to eleven steps. At any point you can go back to the welcome screen and abort the wizard by pressing Skip.
10.2.3.2. General Trailer Info

Enter a descriptive trailer name to identify your trailer. Your trailer name is not sent over WiFi or Bluetooth, and can only be seen in your oneView mobile application. You can choose your trailer model number, or your last name, whatever help’s you identify your trailer.
If you have an Level Up Pro module you can also include the license plate number of your trailer or tow vehicle to make it easier to register at a campground or resort.
10.2.3.3. Bluetooth Signal Strength Indicator
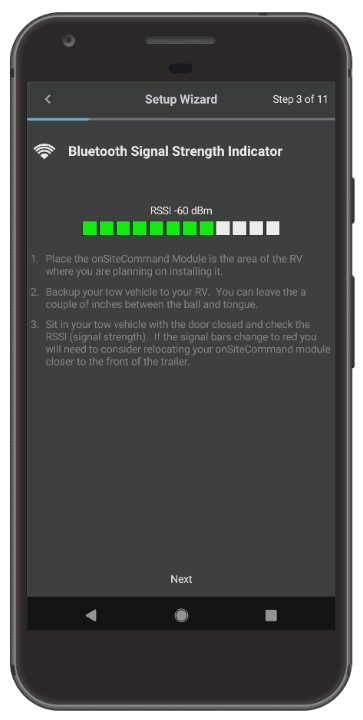
To provide trouble free connections between your mobile device and your Level Up module, it is advisable to test signal Strength level is above -85 dBm mimimum threshold.
Place the module in the proposed location in the RV. Orientation is not important in this step, nor is running any wiring, simply run the module off the battery.
Back the tow vehicle up to the trailer. It’s not necessary to actually connect up the RV to the tow vehicle, but it should be within a couple of inches of the tongue.
Sit in the cab of the vehicle and start the oneView application. Connect to the trailer and start the wizard. On step 3 you will see the signal strength between your mobile and the Level Up module. The signal strength should be greater than -85 dBm. The signal strength bars will be green if the signal is above the threshold. If the signal strength bars are red you will need to relocate the Level Up module either closer to the front of the trailer, or in a less cluttered compartment (i.e. not blocked by metal appliances).
For more information on bluetooth coverage and expectations click here.
10.2.3.4. Units

The oneView supports distance units in inches, centimeters, and millimeters. Default unit type is inches.
For Level Up Pro modules users can choose there prefered temperature units from Celsius or Fahrenheit. The default temperature unit is Celsius. For specifications on the temperature and humidity sensor click here
10.2.3.5. Resolution
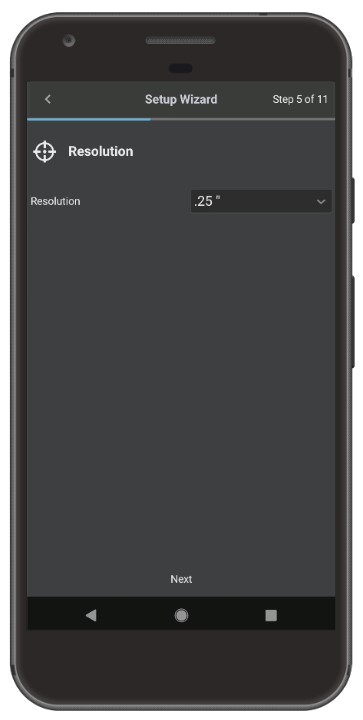
The resolution determines how much the trailer needs to move before the RV is considered out of level. For more information on resolution values click here.
10.2.3.6. Installation Orientation
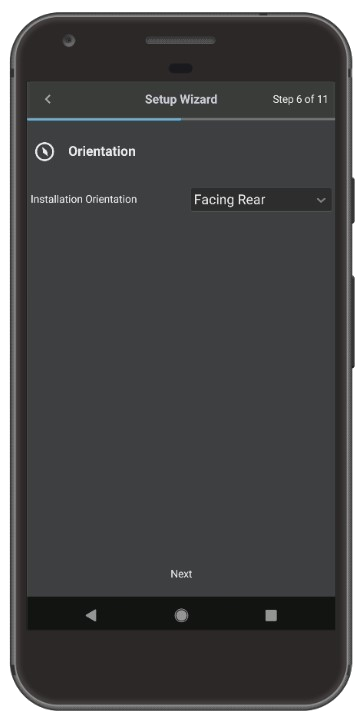
The orientation setting tells the oneView module how the module is pyhsically mounted (i.e. up, down, left or right). The module can be installed in eight different orientations. The orientation is alway referenced based on the label on the front of the module and the orange arrow on the label. For more information on the orientation of the module click here.
10.2.3.7. RV Configuration
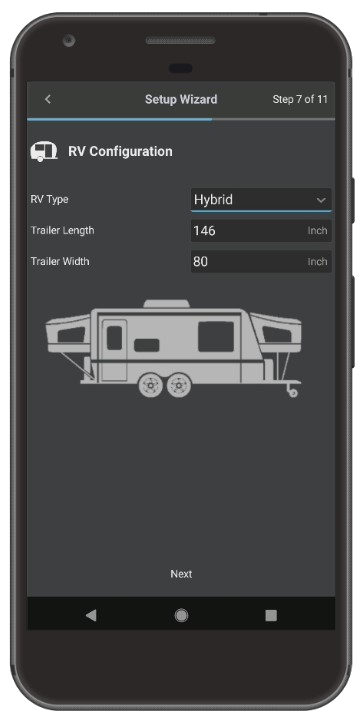
To configure the Level Up module, the module needs to know about the length and width of the trailer. To get more information on how to determine the trailer width (s2s) and trailer length (f2b) measurements click here.
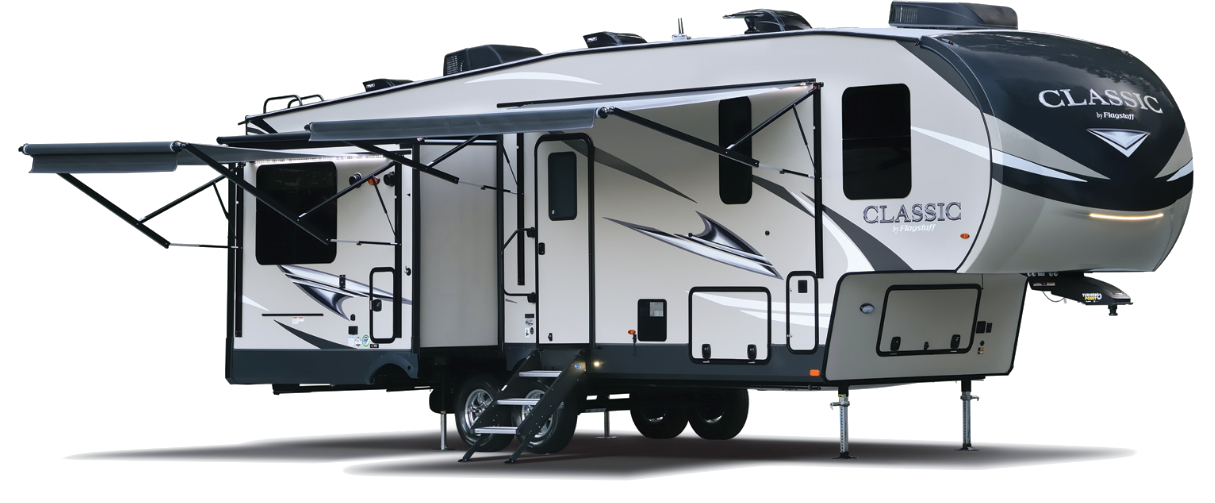
The RV type has no impact on the actual configuration or operation of the module, however the application will show the appropriate image based on your selection in the various leveling screens. This can be useful if you have multiple RV’s.
10.2.3.8. Real Time Clock
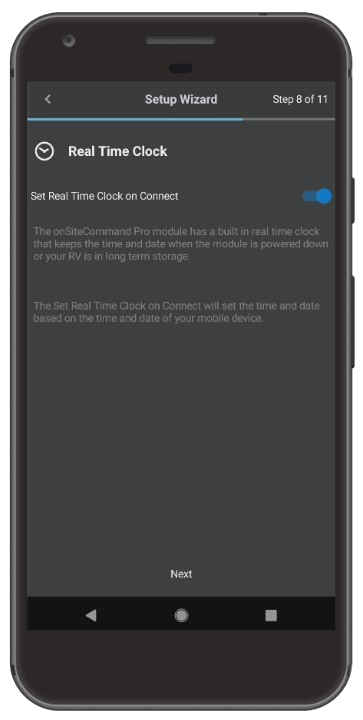
The Level Up Pro modules include a built in real time clock with battery backup. To enable the clock tap on the switch. This will automatically update the real time clock time from you mobile device everytime you connect.
10.2.3.9. EMS Configuration
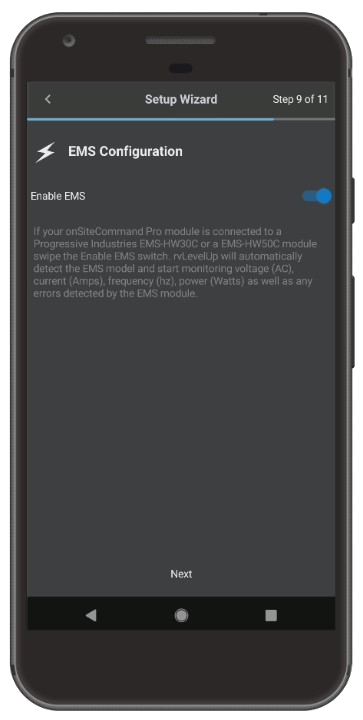
The Level Up Pro modules include EMS support from Progressive Industries. The two supported modules are EMS-HW30C and EMS-HW50C. The module will automatically detect the version you have installed. For more information on how to install and configure your Progressive Industries EMS module with Level Up Pro click here.
10.2.3.10. Battery Configuration
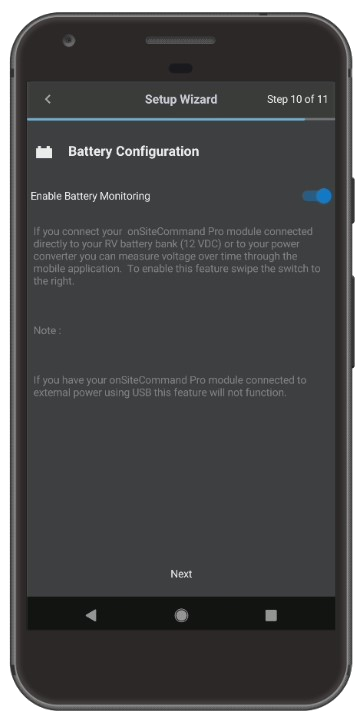
The Level Up Pro module when connected to external power (12VDC) either through the converter or directly to the RV batteries, can provide RV battery status to the oneView mobile application. Press on the switch to enable battery monitoring. You can configure the oneView mobile application with your specific battery chemistry by going into Settings and choosing RV Batteries. For more information click here.
10.2.3.11. Finishing Up
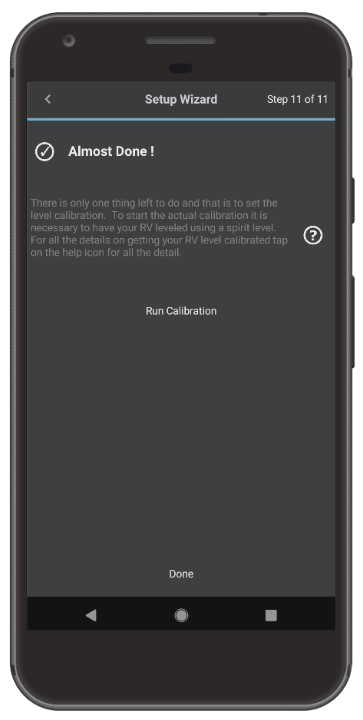
The final screen in the wizard allows you to exit without running the level calibration (so it can be done later) by tapping on Done, or to press the Run Calibration button to start the process. If you tap on the Run Calibration, make sure you have your RV leveled as specified above in the Getting Started section.
10.2.4. Manual Calibration
To set the level reference manually you will need to check the following three settings. All of these settings can be found under Settings | Trailer Configuration.
Orientation of Level Up Module - for more information on module orientation click here.
Trailer Width (side to side) - for more information on determining the trailer width click here.
Trailer Length (front to back) - for more information on determining the trailer length click here.
Optionally you may want to set or update the units (inches, mm, cm) and measurement resolution. These settings are found in the Level Up mobile application by going to Settings | Units.
Note
Changing the unit type or the measurement resolution does not affect the calibration. Changing the trailer width, and trailer length settings will require the calibration process to be repeated.
10.2.5. Saving the Calibration
Level Up will automatically save the results to the Level Up module.
10.2.6. Calibration Results
The level set results are stored on the Level Up module itself, not on the mobile device. This allows you to connect from more than one device (although only one device can be connected at any given time) without having to rerun the procedure or go through some cumbersome sharing of trailer settings.
10.2.7. Confirming The Results
Once you completed the process you can confirm the settings. We would recommend going through your hitching procedue and connect the RV to your tow vehicle. Once connected to the tow vehicle move the trailer forward or backward as room permits and then go through your unhitching procedure and use the Level Up to assist with setting the tongue jack and/or the stablizers for a fifth wheel. Lower all the additional stablizers and extend the slides. Ensure that the Level Up mobile application is still showing level. Go into the trailer and check to ensure that doors and drawers close properly and don’t swing on their own. Confirm with a spirit level that the trailer is in fact level in both front to back and side to side.
If you find the trailer is off level when using Level Up vs checking it with a spirit level, we would recommend running the level set process again. Alternatively if you find the results are close but the Level Up is showing just slightly off as you walk around the inside of the RV you could consider decreasing the resolution to give the Level Up module more leeway.